Today , I will share my knowledge with you about editing photos in Lightroom and I want to help you to find your signature edit style.
I said in the past that Lightroom is a very good photo-editor with a simple to use interface.
So today we will edit 2 photos with Lightroom: a landscape with a sunrise, a portrait (with a human in it).
1. Landscapes
So we have this beautiful sunrise with these nasty clouds in it. Now we will take this landscape to another level.
 |
| Original picture |
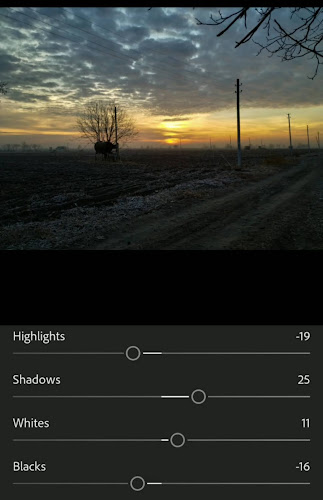
First we will do is the light correction.
First thing we adjusted is the exposure, if the picture is overexposed (too lighter or too darker) we will make some big adjustments here but in my case the photo was relatively well exposed.
The contrast is one of the most important things we should adjust. I like the pictures with a pronounced contrast but too much contrast isn`t good too!
And now the shadows. I this case unaccented shadows look better because they light up other regions than the sun.
Now we will edit the white balance /colors,here we will se some changes.
First we set the temperature. I set it at -7 cause this photo was made in December.
The next important thing we will edit is the Saturation - my favorite option. I set it to 16 cause I like the over saturated pics.
And the last thing we should set is the sharp. I like the photos with much details that means I set it to 55 but if you don`t like the accent on the details you can set it lower.
And now the final result!
 |
| Before |
 |
| after |
As you can see is a big difference between them.
2. Portrait
Here the things are pretty similar but we will do some adjustments winch will not damage the human inside the photo.
 |
| original picture |
I give it some contrast and some light shadows , also I didn`t adjusted the exposure too much. I like to keep the picture aspect darker.
Now we are editing the white balance.
I gave it some warm tones / shades.As you can see I didn`t adjusted too much the saturation cause will damage the photo.
Also here I used some new effects. I gave it a little bit of each effect and I added a little dark vignette to focus more on the human winch is in the shoot.
And the last but not the least the sharp. I never used too much here because it can damage the face or some little details.
And now the final result! |
| The final result |
Hope you enjoy, don`t forget to subscribe and check out others articles about photography. Tell me in the comment section if I helped you with something!


This is a very helpful website. We can find our needy post or tips from this site . I think it is essential for us.
ReplyDeleteLenovo Legion Phone Duel
Informative, interesting and different 🙂👍🏻 liked it.
ReplyDelete